LDR-Controlled LED Collar
This time we made a wearable - for your dog! We love dogs around here, so we have a few of them running around our office. You've already met Luna, our office mascot, in the Evil Fruit bowl project and Yahoo, the neighbor's dog in the Animatronic tail project. Now it's time to introduce you to Nikki. Follow the steps below to make your dog this awesome LED collar, and you won't lose it in the park again - guaranteed!
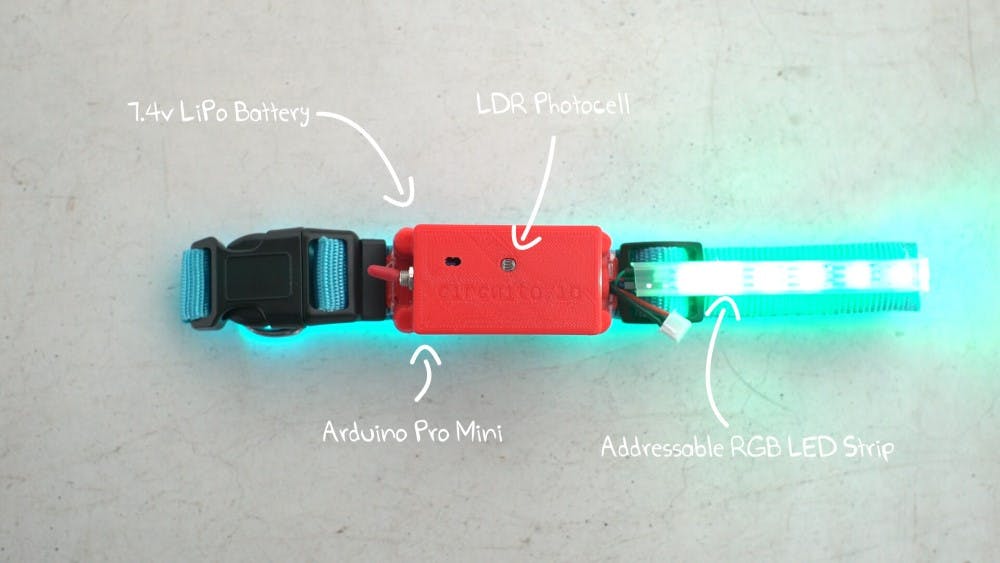
The parts you'll need are:
- LDR - photo-resistive sensor
- Addressable LED Strip
- Arduino Pro-Mini
- Li-po 7.4v battery
Click here to see the circuit diagram, or click the image below:
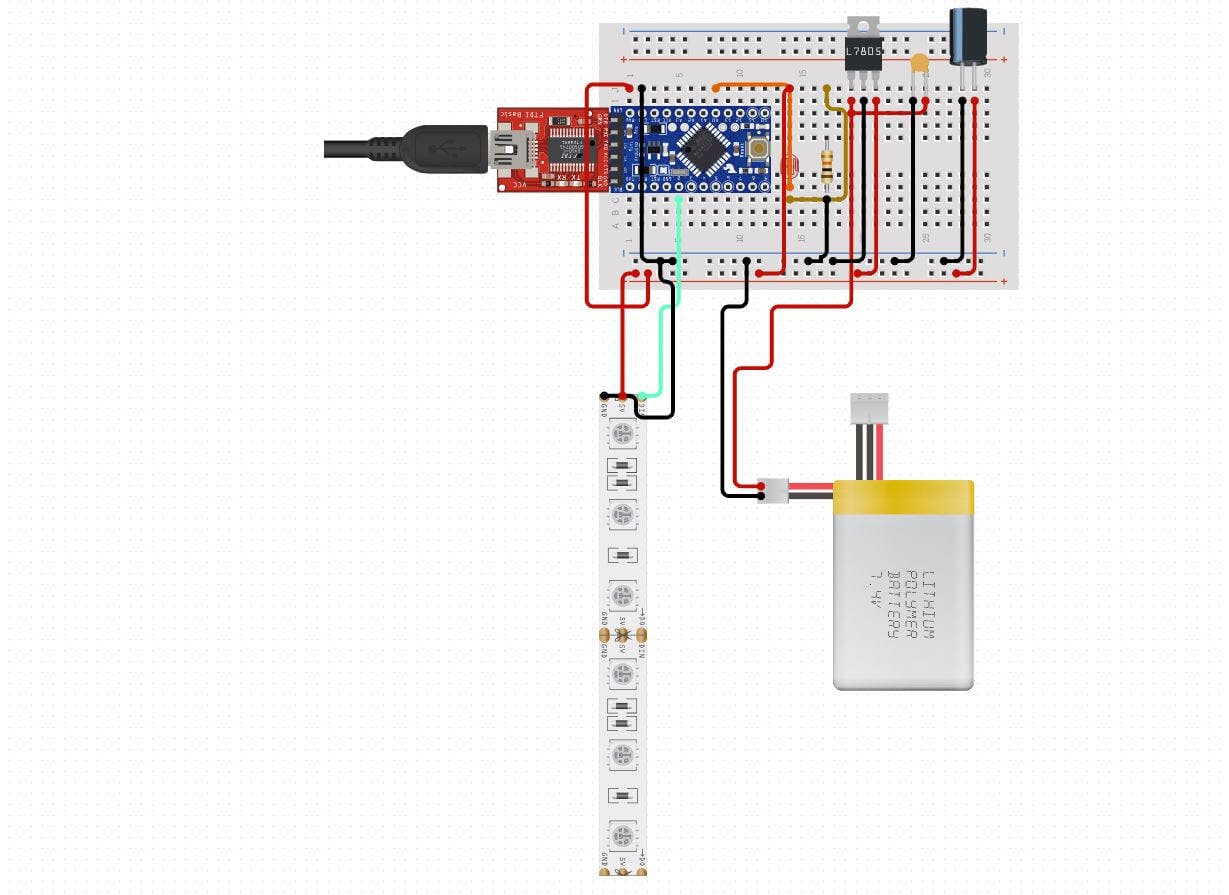
The basic functionality is simple. When it gets dark, the LDR triggers the LED strip to light up and run pre-coded light sequences.
As soon as the LDR detects light, it will stop the sequence and turn off the LEDs.
So actually, it's an automatic LED collar that lights up when it gets dark, and you don't need to do a thing, except for charging the battery from time to time.
If you do want to be able to turn off the collar manually, you can add a switch to the circuit, like we did. Other additions you can add are a Gyro sensor such as the MPU6050 so when your dog is sleeping or not moving, the LED display will be turned off. You can also add a GPS and an SD module to monitor your dog's location.
1. Download the test code from the "code" tab.
2. Make sure to extract the .zip file
3. Open the .firmware Arduino file.
4. Set the correct port and board (Arduino pro-mini)
5. Connect the circuit to your computer and Upload the code.
6. Test your circuit by opening the serial monitor in the Arduino IDE and follow the instructions. If one the components isn't working, first check the wiring, and if it still doesn't work, go through our debugging post.
7. When the circuit is working, replace the test code with the project code from the Github repo. Make sure to leave the //Include Libraries and //Pin Definitions at the top of the code, and also keep all the libraries from the original code.
1. Get a collar that suits you and your dog.
2. Cut the LED strip to the desired length and attach it to the collar. Don't forget to change the number of pixels in the code according to the length you want.
4. 3D print the casing for the electronics. STL files found on thingiverse.
5. Place the electronics in the casing.
6. Go have fun with your dog.
