How to Burn the ATMega328p Bootloader
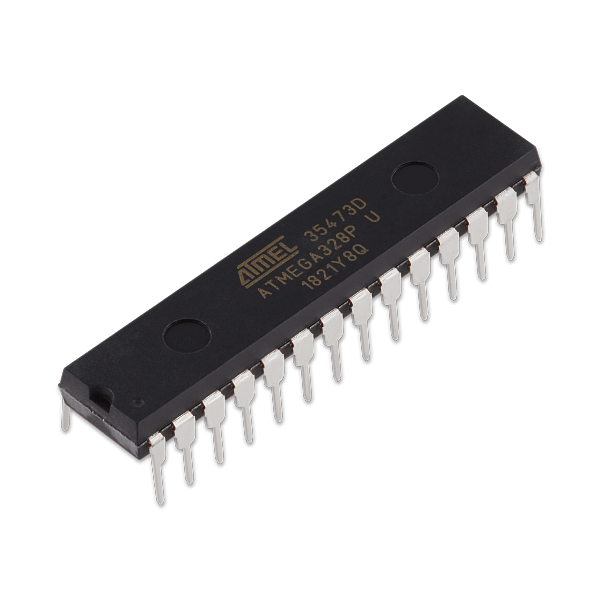
At the center of every Arduino UNO you’ll find Microchip’s ATmega328p microcontroller. It’s the brains of the operation, without it, your Arduino wouldn’t be able to do any of the amazing things it’s famous for.
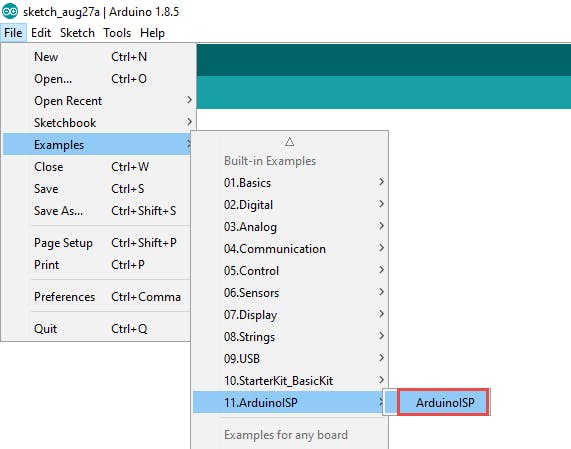
Flash the Arduino with the In-system programmer. You’ll find the ArduinoISP under the ‘examples’ heading in the File menu.
Wire your Arduino to your breadboard. To make your ATMega328 work, you’ll need four additional components:
While it’s possible to load the bootloader without these components (instead relying on the chip’s internal 8mhz clock), you’ll run into fewer problems if you include them.
Wire it all up like this:
Your breadboard will now function using just +5v and ground signals – all of the data signals will come from the ATMega328 itself. You’ll be able to upload sketches to the ATMega328 using an FTDI cable that connects your microcontroller to your computer’s USB socket.
For more info about the ATmega328p and detailed instructions including screenshots, see below.
--
Part of the appeal of Arduino is that it contains everything on a single board, and thereby provides a non-intimidating introduction to programming and electronics. The board contains all of the supplementary components required to get the chip running smoothly – including resistors, capacitors, crystals and voltage regulators. But when you reach a certain point, you might want to transfer your Arduino sketches onto a standalone microcontroller. This involves installing an ATmega328p onto a separate breadboard or PCB, along with a few extra components needed to get the chip functioning.
To do this, you’ll need to burn the bootloader onto the chip. This means wiring the Arduino up to your new breadboard. Used in this way, the Arduino acts as an In-System Programmer or ISP. We’ll guide you through this process, but before we get started, let’s talk about the advantages of taking this approach, and briefly explain what an ATmega328p is.
The megaAVR family of chips was created by Atmel, and later acquired by Microchip Technology when they acquired Atmel in 2016. The ATmega is the flagship of this series, and it’s formed the basis of Arduino boards since the very beginning.
To install your ATmega onto a breadboard, you’ll need the DIP version of the chip. It will slot neatly into the center of the breadboard, so that the legs sit on either side of the gap. Once it’s in position, you’ll be able to use the adjacent sockets to make connections to the pins.
From a certain perspective, the ATmega328p is the Arduino. Your sketches are stored on its internal memory, and it executes all of the instructions contained therein by raising and lowering voltages and reading external inputs. When we talk about connecting something to the Arduino, we’re really talking about connecting things to the ATmega328p – the Arduino environment and circuit board simply provides an easy-to-follow packaging that makes connecting to the ATMega328 a bit more intuitive. The ATMega328 has the same pinout as the Arduino Uno female headers, excluding the power pins.
So what is a bootloader, and why is it so important? You might be familiar with the term from your desktop PC. In this setting, a bootloader is a program that starts as soon as the machine is powered on, and its job is to launch your operating system. Although the Arduino lacks an operating system, it still has a bootloader, which is actually a small piece of software which allows new firmware to be installed onto the chip without the need for an external ISP. If there’s no bootloader on the chip then there’s no way of introducing new firmware, which means that each bootloader will need to be installed using an external ISP at least once.
If your Arduino is loaded with the DIP version of the ATmega328, then you can simply move it across to the breadboard. Since it already has the bootloader on it, you won’t need to do anything else, but you obviously won’t be able to use your Arduino when it doesn’t have a microcontroller.
You might be wondering what the point of all this is. If the Arduino already comes with all of the stuff needed to get the ATmega to function, then why remove one from the other? There are several possible reasons:
Whatever your aims, let’s take a look at how to flash your ATMega328p with the necessary bootloader.
. The ‘MiniCore’ package from MCUDude is a hardware package which adds support for a range of ATmega devices in the arduino IDE, namely:
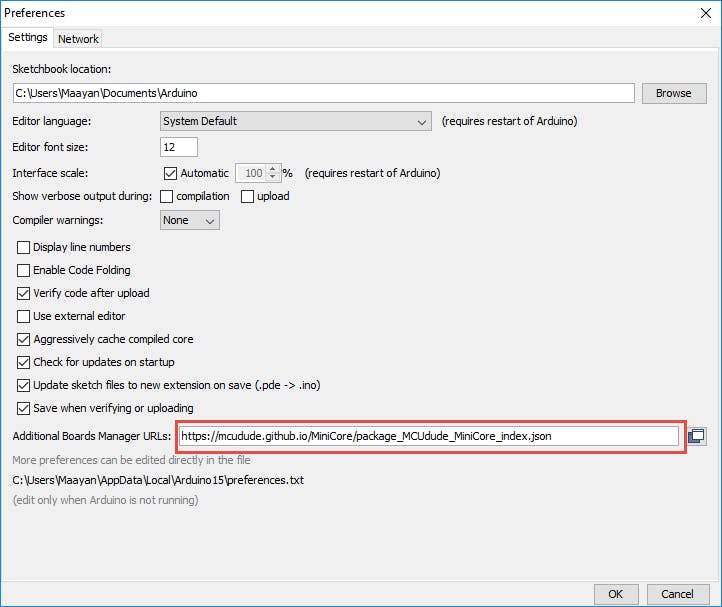
Step 1 - Open up the Arduino IDE and navigate to the preferences (or press ctrl+,). At the bottom of the page is an empty field next to ‘Additional Boards Manager URLs’. You want to copy the following URL in here:
https://mcudude.github.io/MiniCore/package_MCUdude_MiniCore_index.jsonhttps://mcudude.github.io/MiniCore/package_MCUdude_MiniCore_index.json
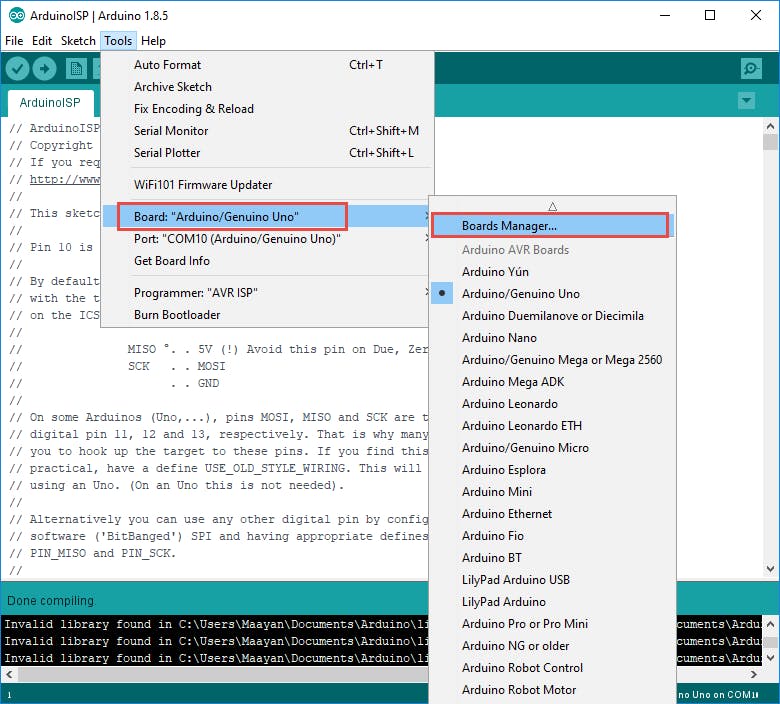
Step 2 - Navigate to the boards manager, which is under Tools>Board>Boards Manager. Here, you’ll find a list of boards your Arduino is capable of talking to.
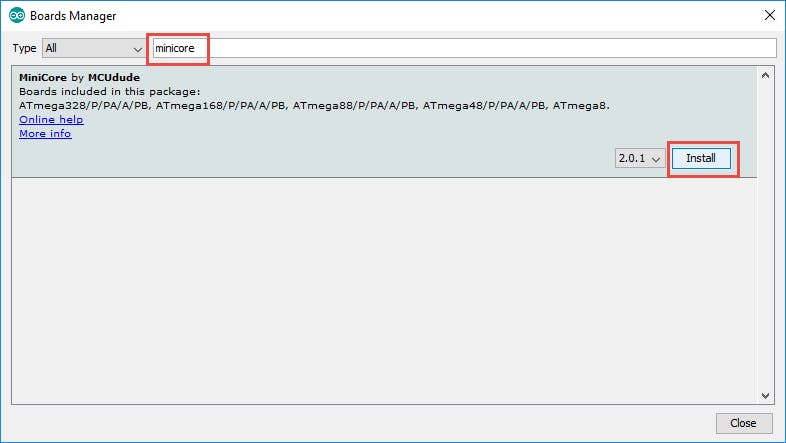
Step 3 - Type ‘minicore’ into the search bar and the relevant entry will appear. You’ll be able to choose from a list of previous versions, but unless you have a specific goal in mind it’s best to opt for the latest. Click ‘install’ and wait for it to complete. Then close the boards manager window.
You’re going to flash the Arduino with the In-system programmer, in much the same way as you’d upload an example sketch. In fact, you’ll find the ArduinoISP under the ‘examples’ heading in the File menu (it defaults to number eleven).
Now we're going to wire up the hardware so that the Arduino is connected to the microcontroller on the board. Along with your wires, you’ll ideally need four additional components to make this work. These are:
The resistor is there to ensure that the voltage on the reset pin is high whenever it’s not active. This prevents the device from randomly resetting whenever there’s noise on the pin. The clock and capacitors are there to provide the chip with crucial timing information. While it’s possible to load the bootloader without these components (instead relying on the chip’s internal 8mhz clock), you’ll run into fewer problems if you include them.
Wire it all up like so:

It’s time to ensure that everything is properly selected. There are three options to remember, any one of which will sabotage your efforts if misaligned. They are all found under the ‘tools’ menu.
Head to the boards menu under ‘tools’ and select ‘ATmega328’. If you’re using a different chip, then you can alter your selection accordingly.

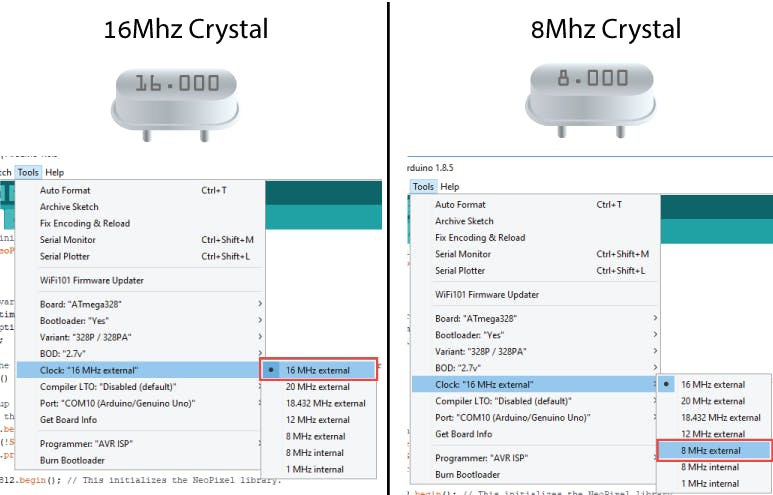
Select the crystal you’ll be using to clock. We’ve said that we’ll be using the 16mhz crystal, so let’s stick with that. If you’re using an 8mhz crystal, then select that instead. The frequency of your crystal should be written in block capitals on the top of the casing.
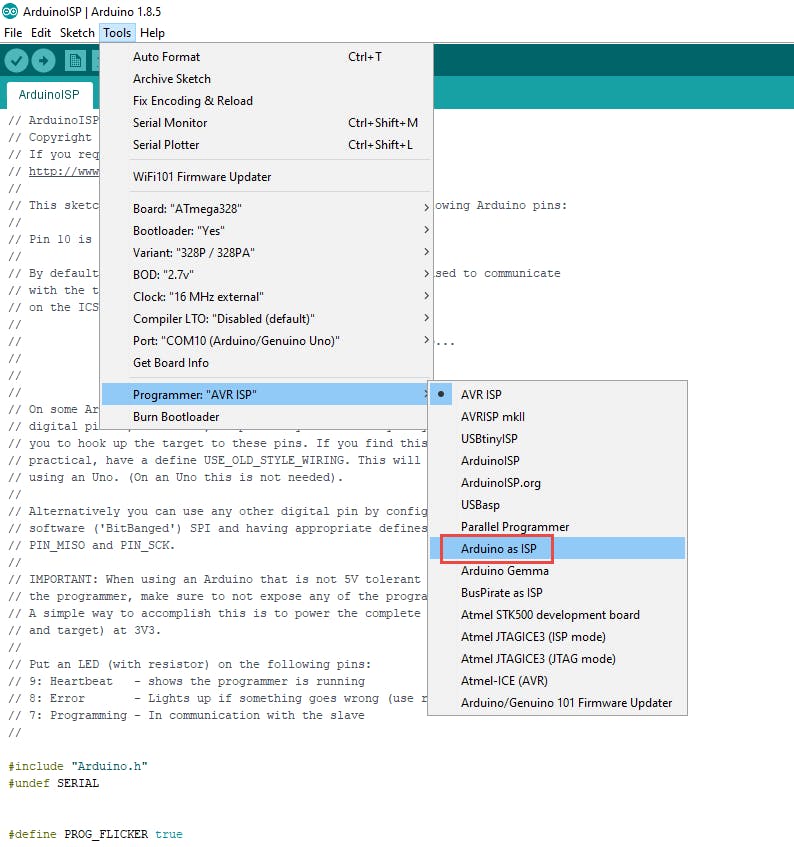
Finally, set your programmer as ‘Arduino as ISP’. You’re almost done!
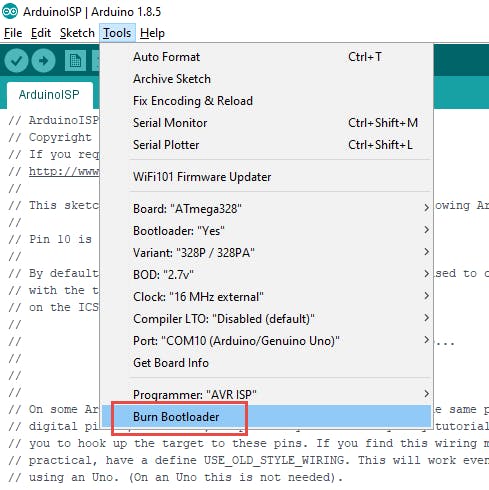
It’s now time to burn the bootloader. Do so using the ‘Burn Bootloader’ option at the bottom of the Tools menu. If you’ve done everything right and nothing has gone awry, you’ll only need to do it once. Afterwards, you can remove the jumper wires connecting pins 10-13 of the Arduino board to the breadboard.
From now on, you only need to provide it with +5v and ground signals – all of the data signals will come from the ATMega328 itself. You’ll be able to upload your sketches to your ATMega328 using an FTDI cable that connects your microcontroller to your computer’s USB socket.
