How to build a simple Arduino-based Automatic Pet Feeder
We have another happy project ready for you. This time, we are going to be working on an automatic pet feeder! It’s a simple and useful project which we had plenty of fun making. As you may have noticed from our previous posts, we really love pets and especially dogs, and we even have one or two of them running around our office at any given time. But Like all dog owners, we also need to entertain them and feed them when we're not around or don't have time to play with them, and this automatic pet feeder we designed is exactly the solution for this issue. So let's dive in!
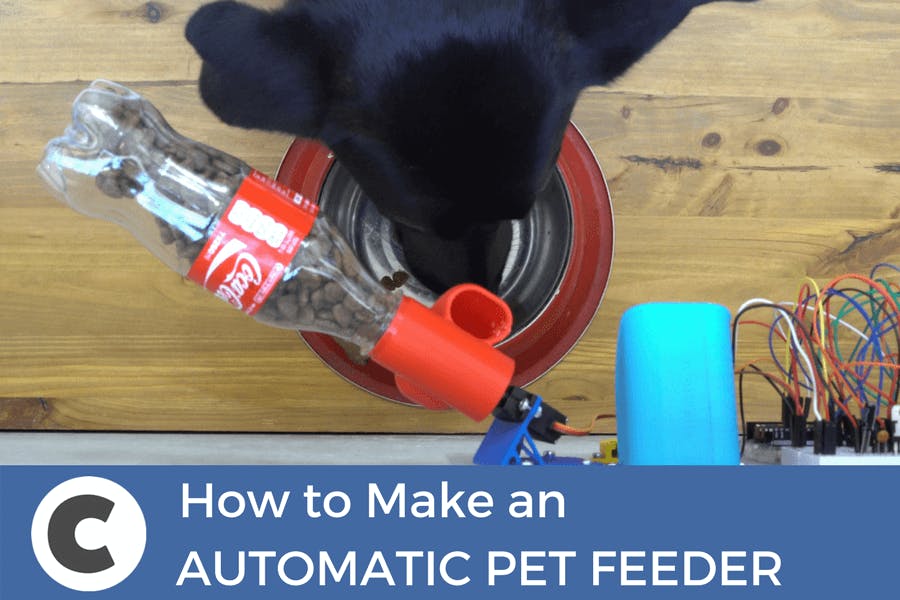
As you can see, we designed the dispenser for dogs, but you can definitely use it for other pets as well. The IoT Pet Feeder can be coded to complete a variety of tasks, for instance, you could program it to fill the food bowl at certain intervals or program it to detect and fill up an empty bowl. You can also program it to give food only after your dog follows certain orders.
For this particular build, we used a PIR Sensor that detects movement. When your dog approaches the food bowl, the sensor recognizes it and triggers a servo motor that operates the feeder. We also connected this build to an ESP8266 Wifi module and created a Freeboard dashboard that allows us to communicate with the feeder via a mobile device.
Circuit and code
Here are all the components you need for this build:

If we look at the circuito.io builder:
The PIR sensor is the input
The Thin Speaker and ServoServo are the output
The Arduino Uno is the controller
And the ESP8266-01 ESP8266-01 is the connectivity
For the Power choose the 12VDC 2A wall unit.
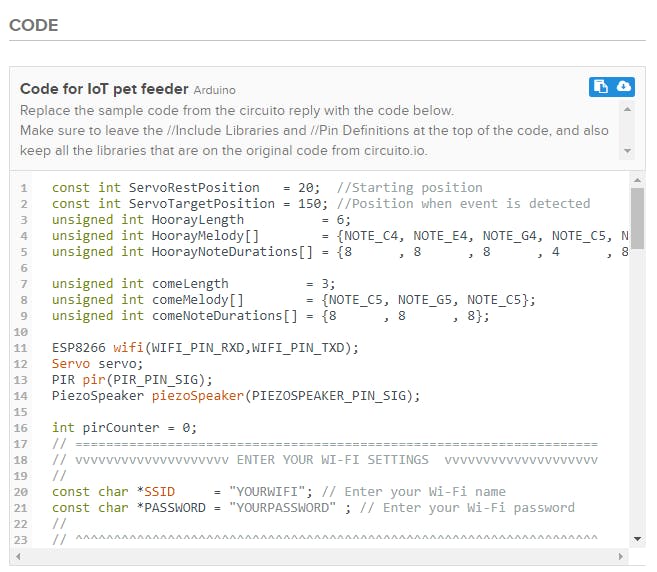
Once you get the circuit ready, download the test code and upload it to your Arduino. This code allows you to test for problems in your circuit. Follow the steps in the Reply to test each component.
Then, once you see that everything is working properly, copy the custom code from our Hackster project page and replace the test code.
There are four physical parts for the pet feeder which we designed and 3d printed. You can find them in the “custom parts and enclosures” section at the bottom of this page.
These physical parts are designed to hold the different parts of the project together, therefore, you can find a mount for the speaker, servo and PIR. These parts are modular so you can use them in other builds with these components
As mentioned earlier, we decided to connect the feeder to the internet using an IoT WiFi device called ESP8266-01. A connection to the internet creates many opportunities and new options such as remote controlling the feeder, talking to your dog, and even videotaping your dog to see what they are doing when you’re not around. At this stage, we’ll focus on being able to control and get feedback from the feeder through a designated dashboard. We used an app called Freeboard that allows us to create a custom dashboard for the project with ease. You can see the full instructions on the Hackster tutorial.
There are quite a few things you can do to customize this build. For instance, you can add a weight sensor to measure the weight of the food in the bowl and have the feeder respond to changes in weight. You can use a range finder instead of the PIR sensor if you’d like and program it to detect the distance at which your dog is and refill the bowl if your dog comes close enough. Another cool option is adding LED lights that will indicate the “status” of the food bowl. There are really many options with this nice little device, and you can have fun making it and also using it with your dog.
If you make some modifications, you can design this build to suit other animals like birds or hamsters. In fact, you can use it for yourself as well. Program it to fill up your snack bowl according to particular intervals. It can be of great assistance if you’re on a diet or just a frequent snacker.
We hope you liked the project as much as we did. Do write to us and let us know what you thought about it. If you’ve got ideas for modifications, we’d love to know about them, especially if you’ve already made them.