How To Make a Carbon Monoxide Detecor With an MQ7 Sensor
Welcome to another project by circuito.io. This time, we're going to use a the MQ7 carbon monoxide detector. This sensor will help us monitor the levels of Carbon monoxide concentrations in the air. When the concentration reaches a high level (which we pre-set) the RGB LED will change from green to red.
Living in cities is convenient in many ways such as high-quality public services such as healthcare and education. However, for all the advantages offered by city living, it has not come without its own costs. Pollutant levels such as Carbon Monoxide in urban environments are sometimes unacceptably high. In many heavily urbanized areas, particularly in the developing world such as China, India and Brazil, carbon monoxide detectors often register levels many times higher than accepted ‘safe’ levels.
Note: the video shows an older version of circuito.io. The app has changed a lot since then
Unfortunately, this is by no means a problem exclusive to the developing world, with many major cities as far afield as Singapore, Seoul, London, New York and Los Angeles also regularly experiencing unsafe Carbon Monoxide levels.
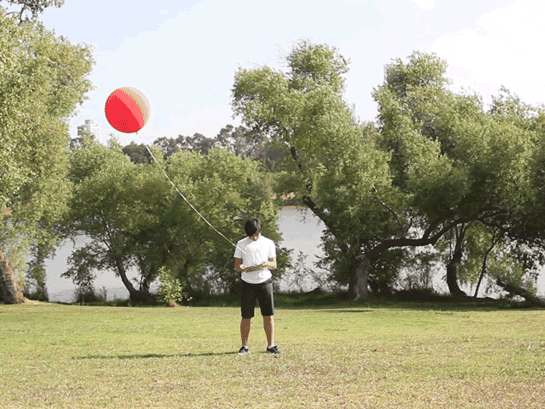
As with any problem, the first step to overcoming it is to understand the nature and scope of the problem. And it is with that goal in mind that we developed The Red Balloon Air Pollution Detector, to help people monitor air pollution levels in their local environment.
The red balloon carbon monoxide detector is easy to assemble and makes for an excellent project for beginners and even kids. So, if they’ve been watching you put together some of our other Arduino projects and would like to join in and try making something, this is a great project for them to get started on.
With just a handful of parts and some basic assembly work needed, you can have this simple home-made carbon monoxide detector up and running in just a matter of hours. Once it’s put together you can test it around the neighborhood, in your backyard or anywhere else you’d like to measure the carbon monoxide levels.
The basic idea is quite simple: A carbon monoxide detector is attached to the red balloon which allows it to measure Carbon Monoxide concentrations in the air. If the concentrations are outside safe limits (which can be set and customized by you when you program the system) the LED will turn from green to red.
This setup can be easily modified to suit a variety of needs.
Arduino Uno Carbon Monoxide Sensor - MQ-7 RGB Led Common Anode USB Cable A to B Battery Holder - 4xAA
100 Ohm Resistor 220 Ohm Resistor Gas Sensor Breakout Board 10K Ohm Resistor BreadBoard - Half Size Jumper Wires Pack - M/M Male Headers Pack- Break-Away
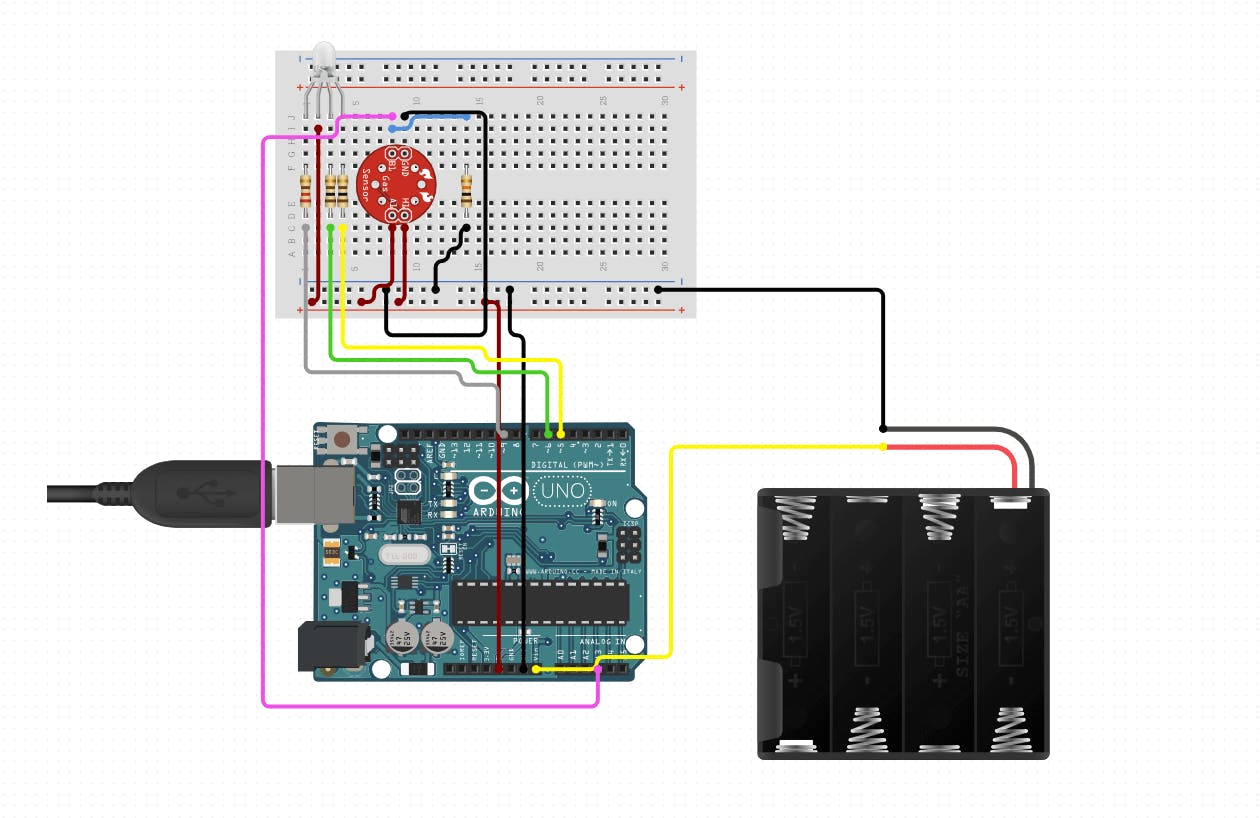
Click here or the diagram below for a detailed wiring guide. Don’t forget to solder the MQ7 sensor to its breakout board.
After you wire the circuit, you’ll also need to:
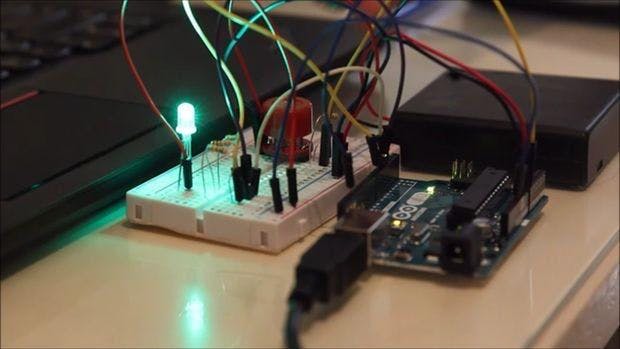
First, use the test code you received in the original reply, to verify that the wiring is correct. Then, download the code for the carbon monoxide detector and extract it to your computer, by clicking the button below.
The MQ7 CO detector is an analog component therefore, it’s connected to the Arduino ADC pin. The values read by the Arduino will be in the range between 0-1023. In order to translate the ADC values to PWM values (required by the LED) – 0-255, we use the map() function, which is then stored in mq7Val variable. Using this variable, we can determine which color we want to control on the LED – Red, Green or Blue. The color and intensity of the LED will change according to the co detector readings and the color we decided to control.
-- Now that the circuit and code are ready, all that's left to do is get a balloon and connect the MQ7 co detector to it using zip-ties. If you really want to go all out, you can add a Wifi module and collect the data on a database that you can later share with others.
Got any questions? feel free to comment below or write on our community forum.
Enjoy Making!