What’s a Single Board Computer and which one is right for me?
Recent decades have seen the landscape of hobbyist electronics transformed by a new breed of single board computers. These devices, as you might well imagine, are entire computers built onto a single circuit board.
Unlike a modern desktop computer, an SBC doesn’t need additional memory or storage in order to boot. It doesn’t demand that you thread power cables through a crowded case, nor does it require that you strap in RAM, plug in a million case fans, or squish a pea-sized globule of thermal compound beneath a heatsink.

These differences in construction reflect differences in purpose. A single board computer can’t do many of the things that a modern high-performance PC does. But then, it doesn’t try. Instead, SBCs serve in a range of educational, commercial and industrial applications. You’ll find them in ATMs, virtual slot machines, jukeboxes, automated checkouts and just about everywhere else.
But the devices we’re interested in appeal to aspiring engineers and part-time tinkerers. In this article, we’ll examine five noteworthy single-board computers.
What’s the difference between an SBC and an MCU?
Before we proceed, let’s draw an important distinction between an SBC and an MCU. An MCU, or Microcontroller Unit, is a form of embedded system which incorporates an entire computer into a single chip. Under the hood are a processor, memory, storage, and programmable input and output pins. Microcontrollers aren’t powerful, nor are they easily reprogrammable. But then, they don’t need to be; they can be manufactured on an enormous scale for next to nothing, and can perform a range of tasks for which a fully-fledged computer would be ill-suited.
Take the microcontroller in your television’s remote control. With no operating system to inhibit it, nor programs to run, it’ll sit dormant for days or weeks, consuming next to no power. That is, until you press a button, generating a signal at one of its connecting pins and thereby causing it to immediately fire off the appropriate signals. Microcontrollers are to be found in a range of embedded computers, which can be found everywhere from industrial computers to the latest IOT edge devices in the home.
With that proviso out of the way, let’s consider the most famous of all SBCs, the ubiquitous Raspberry Pi.
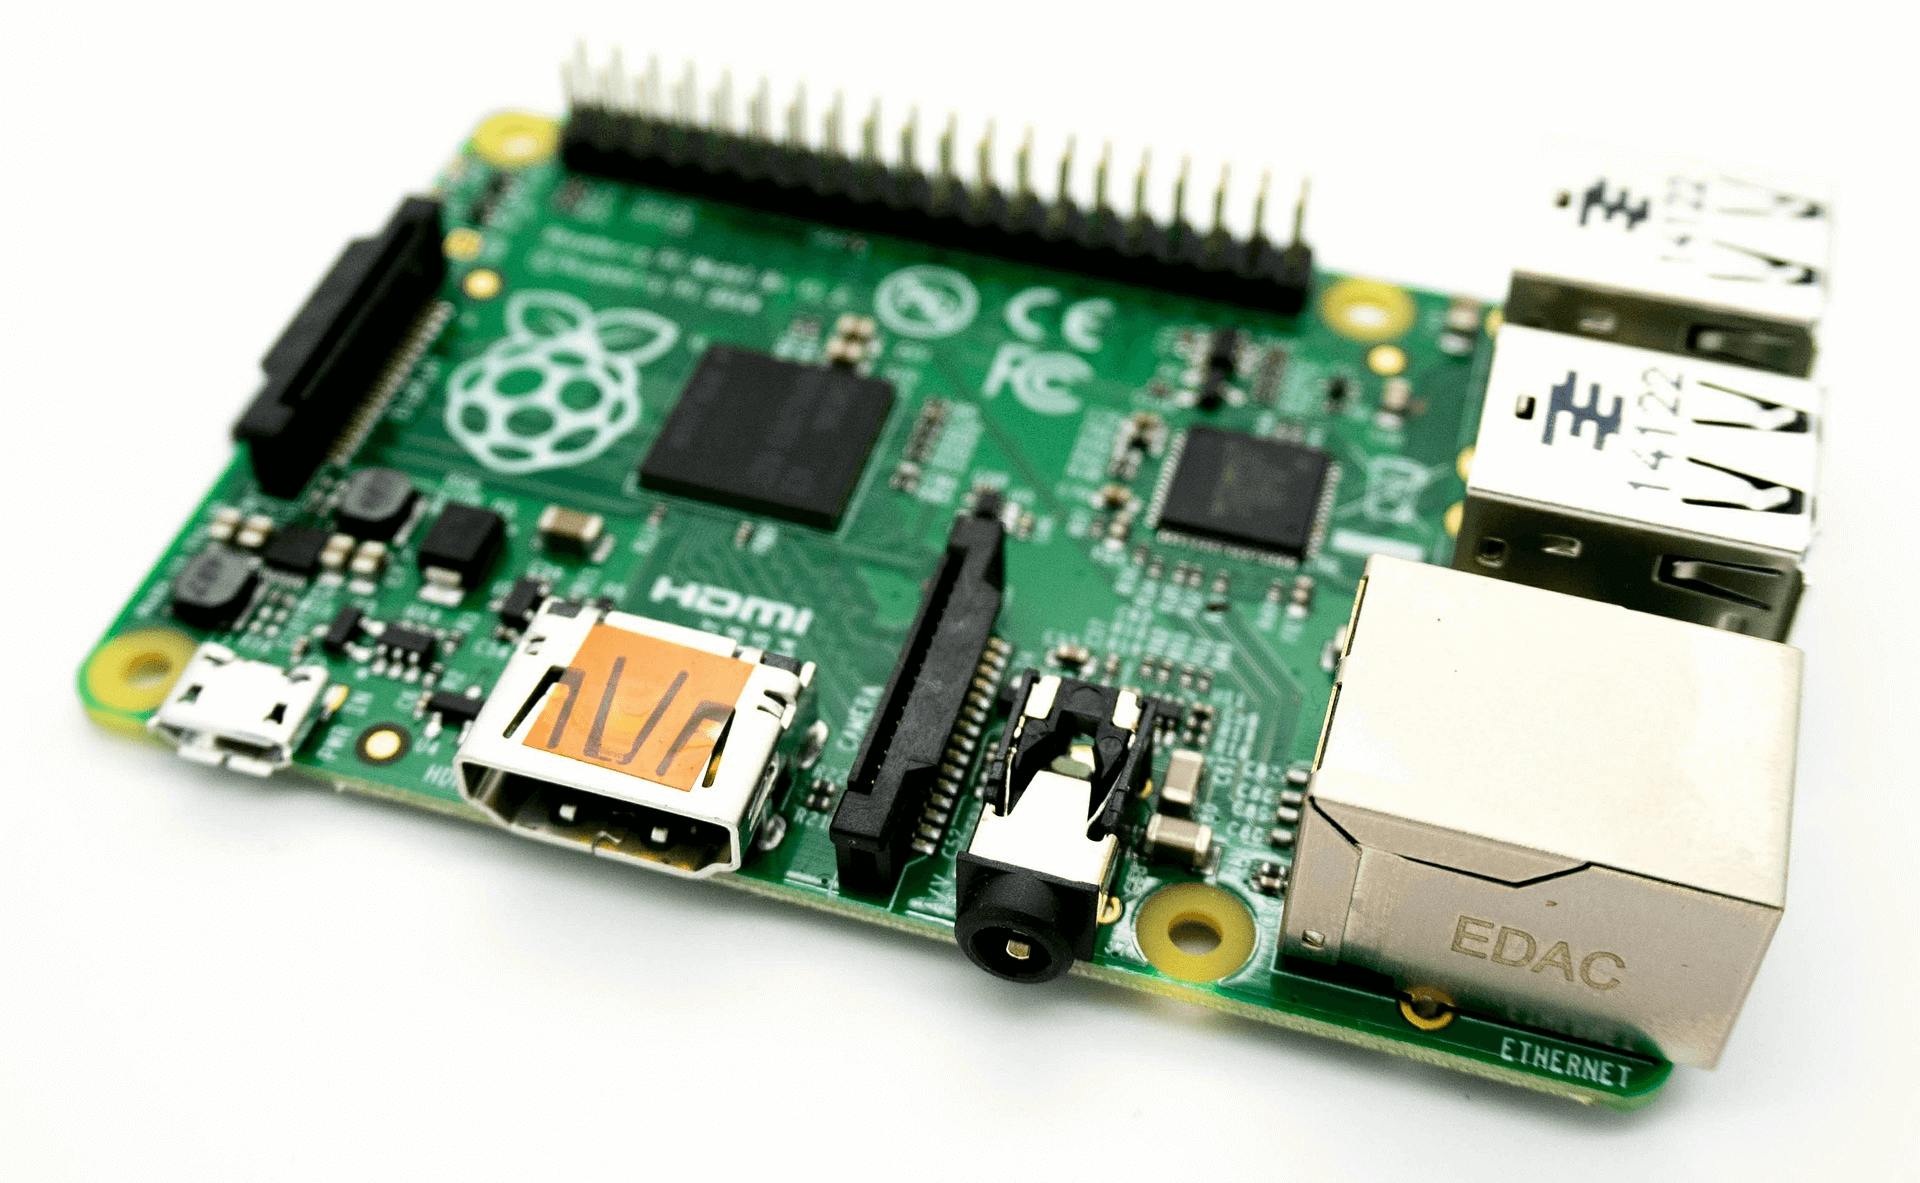
Raspberry Pi

There’s a good reason you’ve probably heard of the Raspberry Pi. Successive generations of this single-board computer have sold more than nineteen million units worldwide. It was the work of the Raspberry Pi Foundation, who took inspiration from the BBC Micro computer, after which subsequent models of the Raspberry Pi have been named. This SBC was conceived of as an educational tool, and is still principally marketed towards classrooms of would-be coders. But its applications go far beyond that. Upon release, it caught the attention of the world’s electronics community, enjoyed enormous success, and spawned a small army of imitators(whose work we’ll look at later).
First, let’s take a look at the specs of the latest model, the Raspberry Pi 3 Model B+:
CPU - Broadcom BCM2837B0, Cortex-A53 (ARMv8) 64-bit SoC @ 1.4GHz
Memory - 1GB LPDDR2
Connectivity - 2.4GHz and 5GHz IEEE 802.11.b/g/n/ac wireless LAN;Bluetooth 4.2;BLEGigabit Ethernet over USB 2.0 (maximum throughput 300 Mbps)
Pinout - 40-pin GPIO header
Ports - Full-size HDMI4 USB 2.0 portsCSI camera portDSI display portComposite video port4-pole stereo outputMicro SD port
OS - Raspbian
Power - V/2.5A DC power input
At around $35, the Raspberry Pi 3 Model B represents inarguable value, and the obvious choice for those looking for a single board computer under $50. For your money, you’ll get a 1.2Ghz quad-core ARM cortex a53 processor, whose performance dwarves that of previous generations. Further upgrades come in the form of built-in 802.11n Wi-Fi and Bluetooth, addressing two of the complaints most often-levelled at its predecessors. This single-board computer also outputs hd video, though it lacks the muscle required to reliably render in 4k.
Your first challenge will be installing the default OS, Raspbian, onto a micro-sd card, and then getting it to boot. Thanks to comprehensive (and, more importantly, comprehensible) documentation, this is pretty straightforward. But even more instructive is the enormous body of user-created knowledge from which you’ll be able to draw when you're just getting started with Raspberry Pi. Encounter a problem with your Raspberry Pi, and the chances are overwhelming that someone out there will have encountered the same problem and posted the solution online. And if they haven’t, the platoon of experts who frequent the Raspberry Pi forum will be more than willing to lend you their attention. If you'd like a little inspiration, you might check out our roundup of Raspberry Pi projects from around the web.
There are several different flavors of Pi to choose from. For many, the stripped-down Raspberry Pi Zero might be all that’s required. The Pi Zero is about the only $5 single board computer available, and so makes an excellent entry point into the world of SBC.
Of course, being so cheap, the Raspberry Pi comes with its share of technical limitations. Since the ethernet port and the USB are powered by the same bus, it isn’t the best choice for high-speed routing. Another problem stems from limited memory: there’s only 1GB of it, and it’s of the outdated DDR2 variety (as opposed to the ddr3 sdram found on newer boards). Moreover, the Wi-Fi is capped at around 2.5mb/s – which is bad news if you’re looking to stream your Blu-ray collection (or even low-res YouTube content).
With that said, it’s difficult to look past the Raspberry Pi as an entry point into the world of single board computers. It’s brought programming to the masses, and allowed for the creation of all manner of weird and wonderful devices. Pick up the Raspberry Pi 3 B+ and you’ll have the peace of mind that comes with knowing it’ll stay in production until January 2023, at the very least. By then, however, your adventures in SBC might have led you onto another, more specialized device.
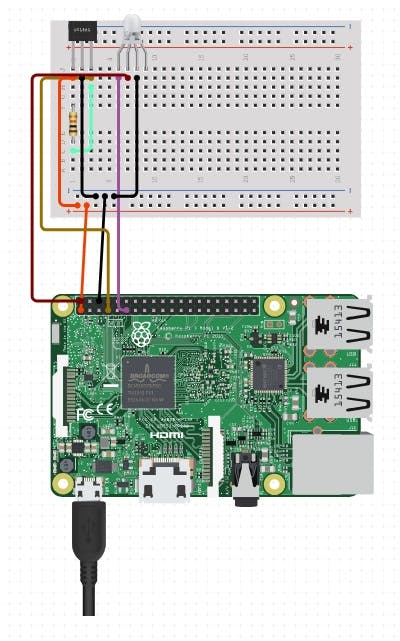
Let's run through how to get a Raspberry Pi added to your Circuito.io circuit. It's very straightforward; simply search for the Raspberry Pi in the component list on the left of the interface, and drag the Pi from there into your circuit. Alternatively, you might click the device to bring up the relevant description, and then press the red 'swap' button in the bottom left-hand corner of the window.

The Raspberry Pi will automatically form the hub of your circuit, replacing the default Arduino while preserving any connections you've made to the GPIO header.

BeagleBone Black

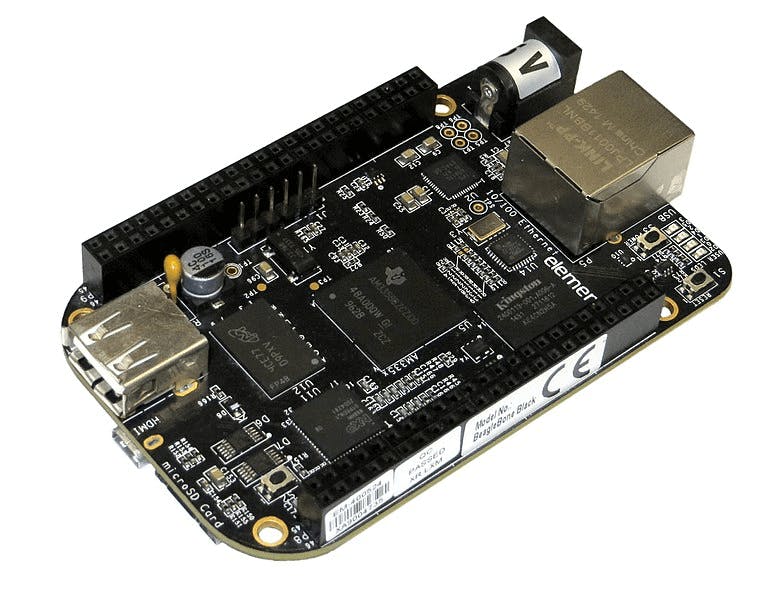
The enormous success of Raspberry Pi prompted a stampede of developers looking to launch affordable SBCs of their own. Among them was semiconductor giant Texas Instruments, whose BeagleBoard single-board computers have been in production since 2008. The product evolved into one of the most popular Raspberry Pi alternatives: a low cost, community-supported platform called the BeagleBone, which came to become the BeagleBone Black in 2013.
The purpose of this board is to provide a platform for the creation of new System-on-Chip devices. At launch, it was a technical match for the Pi, but subsequent upgrades to the Pi have left the Black seeming a little on the underpowered side:
CPU - AM335x 1GHz ARM® Cortex-A8
GPU - PowerVR SGX530
Memory - 512MB DDR3
Storage - 4GB 8-bit eMMC flash
Connectivity - USB client+hostEthernetHDMI
Pinout - 2x 46 pin headers
Ports - micro HDMI1 USB 2.0 portMicro SD port
OS - Angstrom
Power - 5V/2.5A DC power input
The BeagleBone Black’s greatest strength is that, unlike the Raspberry Pi, it boasts a built-in 8-bit flash, from which it can boot Linux directly in ten-seconds flat. So, you can dispense with the SD card until you need to update the kernel, which makes getting started a relatively painless process. While the board was developed with Angstrom in mind, it’ll play nicely with Ubuntu, Debian and a host of more exotic kernels.
But the BeagleBone’s real strength lies in its extensive connectivity options. With two 46-pin headers sprouting from the top, you’ll have 92 connection points to choose from. Among these are more I2C, CAN and SPI buses than most users will reasonably need, along with plenty of timers, PWM outputs, analog inputs and GPIO pins.
Much like the all-conquering Arduino, the Beaglebone can be expanded via stackable modules, which affix to both sets of pins. They’re known as ‘capes’, and really qualify as daughter-boards. With their help, the Beaglebone can be augmented with all manner of devices – ranging from LCD screens to battery-packs to audio interfaces, and without the hassle of breadboards and trailing cables spewing all over your workspace.
One significant drawback of the BeagleBone Black is that it offers just a single USB port. Consequently, you’ll need to attach a USB hub to connect both a mouse and a keyboard. If you have one lying around, then you’re alright. If you don’t, you’ll need to factor in the extra cost and clutter.
At five years old, the BeagleBone’s performance is beginning to lag behind that of its competitors. Its components are unlikely to be flattered by direct comparisons to, say, the latest Raspberry Pi. But the appeal of the Beaglebone lies in its adaptability and simple connectivity, rather than its raw computing power. As one of the leading raspberry pi alternatives, it fills a role in workshops across the world – and it might just fit into yours, too.
Nvidia Jetson TX2

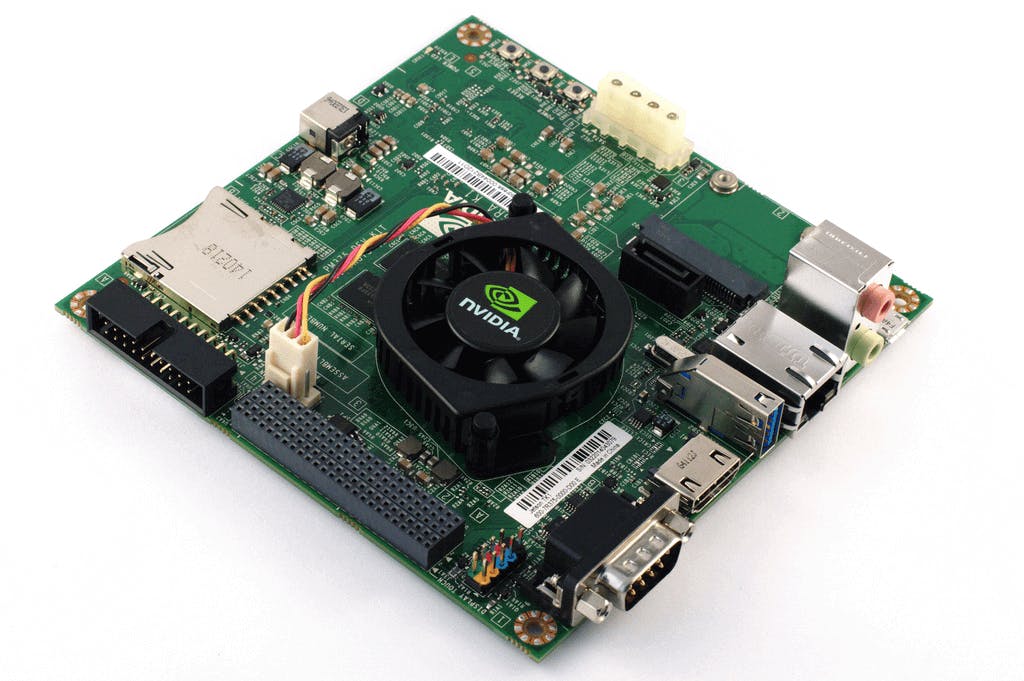
If you’re the slightest bit interested in gaming (and PC gaming in particular), then you’ll have heard of Nvidia. The company is best known for their pixel-pushing hardware. But the same computing horsepower that allows Lara Croft’s coiffure to realistically tumble on a Himalayan breeze can also drive sophisticated machine-learning systems, of the sort that the Jetson platform aims to encourage.
At a whopping $599, the Jetson TX2 developer kit is priced way beyond the reach of a hobbyist or high-school student. That’s because it’s not aimed at those markets; it’s an incredibly fancy engineering tool, built to usher in the AI-powered future. Such a task warrants an impressive list of specs. And so it proves:
CPU - Dual-core Denver 2 + Quad-core A57 ARM
GPU - NVIDIA Pascal, 256 NVIDIA CUDA Cores
Memory - 8 GB 128-Bit LPDDR4
Storage - 32 GB eMMC, SDIO, SATA
Connectivity - Up to 6 2-lane Cameras4k video encodersWi-FiBluetoothGigabit EthernetCAN controller
Pinout - 40-pin and 30-pin GPIO headers
Ports - HDMIMicro-USB 2.0USB 3.0Micro SD portRJ-45 EthernetSD-card readerAntenae terminals4-lane PCI connector20-pin JTAGSATA Data and Power ConnectorUART connectorCamera expansion header, preinstalled with a 5MP camera
OS - Linux
Power - 5V/2.5A DC power input
Inside each kit you’ll get a Jetson module, as well as a reference carrier board, cables, and a power supply, and a little pre-installed software to get you started. The TX2 employs the same ‘Pascal’ micro-architecture found in the company’s 10-series graphics cards; in terms of raw computational power, it knocks the other devices on this list out of the park.
Jetson’s connectivity is similarly impressive. The module connects to the carrier board via a 400-pin connector. Atop the board is an aluminum plate connecting to a reassuringly-chunky heatsink and fan. The built-in encoders and decoders can juggle 4k video at sixty frames without breaking a sweat, and you’ll have the sort of connectivity options you’d expect to find on the motherboard of a desktop PC, including SATA and PCIe. In terms of power consumption, the TX2 is roughly equivalent to its Maxwell-powered predecessor, the TX1 – except when idling, where it pulls well ahead. You’ll be able to switch between 1.8 or 3.3 volts for given pins on the 40-pin GPIO header, and you can route the CAN bus through the 30-pin one. And so on.
Once you’re done prototyping, you’ll be able to pick up a module for $399 (provided that you’re willing to buy more than a thousand of them). This price point has prevented Nvidia from fostering the bustling community enjoyed by cheaper devices like the Raspberry Pi. There are thousands, rather than millions, of users, and thus you’ll need some considerable programming experience before taking the leap.
If you’re studying for a master’s degree in engineering and want to prototype a new warehousing drone, or you’d like to help blind people walk unaided across the street, then Jetson is worth your attention. For most hobbyists, however, it doesn't do much that an Raspberry Pi running Linux can't.
UDOO Quad

The UDOO series of SBCs offer the flexibility of the Raspberry Pi alongside the connectivity of the Arduino. As such, its commercial existence commenced with a spectacular crowdfunding success. It smashed through its $27,000 target within a couple of days on its way to an eye-watering total of $641,614.
Among the latest line-up of UDOO devices is the UDOO Quad:
CPU - NXP® i.MX 6 ARM Cortex-A9 CPU Quad core 1GHzAtmel SAM3X8E ARM Cortex-M3
GPU - Integrated Graphics
Memory - 1 GB DDR3
Storage - SATA, Micro-SD
Connectivity - Gigabit EthernetWi-Fi
Pinout - 76 fully available GPIOArduino-compatible R3 1.0 pinout
Ports - Micro USB + USB OTGRJ45Sata (the Quad version only)Audio out and mic 3.5mm jack inputs
OS - UDOOBuntu
Power - 12V DC power input
The device features the same Atmel CPU found on the Arduino Due, alongside a quad-core ARM processor clocked at 1Ghz. Together, the two CPUs provide the functionality of the Arduino and Raspberry Pi on a single board. If you’re the owner of both and would like to get the two to talk to one another, then the UDOO is worth considering. It’s this convenience that really justifies the asking price of $135. After all, who wants to spend hours interfacing the two devices when someone’s already done the work on your behalf?
If you’re looking for something to replace your desktop PC, then the X86 ULTRA is worth considering. Its quad-core x86 64-bit processor and 8GB RAM affords it the power to serve as a media hub, and it comes with ample ethernet and USB connections.. You’ll also get a few extra gadgets built into the Arduino side of the board, including a gyroscope and a six-axis accelerometer.
UDOO devices are capable of running a range of Linux kernels, including a purpose-built version of Ubuntu known, imaginatively, as UDOOBuntu. This custom operating system is the result of extensive collaboration with the UDOO community, and is intended as a means of taking the desktop out of the picture entirely. It streamlines everything for improved boot times, memory handling and support for a range of peripherals, including external hard drives.
The Quad is just one of more than half-a-dozen different editions of the UDOO, ranging from the $50 dual-core ‘Neo Basic’ modal all the way up to the quad-core Pentium that drives the $267 ‘UDOO x86 Ultra’. Your happy medium might lie somewhere between those two extremes.
UDOO plays nicely with 3.3v Arduino shields, and, with the help of a couple of resistors, with 5v ones, too. The range enjoys an active following, though a relatively small one, and much of the knowledge applicable to its parent devices can be brought to bear on the UDOO.
As we've discussed on these pages, the Arduino and the Raspberry Pi are very different devices. If you’re already familiar with either, and you’re looking to bring them together into the same project, then this SBC is sure to be among the most attractive raspberry pi alternatives.
Odroid XU4

Finally, we have the Odroid XU4, the work of a South Korean hardware company called Hard Kernel. Its name is derived from the words ‘open’ and ‘Android’, despite the fact that the Odroid hardware isn’t entirely open-source. The first version was released in 2009, and new generations have been forthcoming regularly ever since. The XU4 shipped in 2015, with a host of hardware improvements and full backward compatibility.
CPU - Samsung Exynos5422 Cortex™-A15 2Ghz and Cortex™-A7 Octa core CPUs
GPU - Mali-T628 MP6
Memory - 2GB LPDDR3
Storage - eMMC5.0 HS400 or MicroSD
Connectivity - Gigabit EthernetWi-FiUSB 3.0
Pinout - 76 fully available GPIOArduino-compatible R3 1.0 pinout
Ports - 2x USB 3.0 host1x USB 2.0 hostRJ45Sata (the Quad version only)Audio out and mic 3.5mm jack inputs
OS - Linux
Power - 5V/4A DC power input
For a mere $59, Odroid offers performance which far outstrips that of cheaper tinker-boards. Under the hood are eight cores clocked between 1.4 and 2 Ghz. As a consequence, it makes a serviceable mini-PC; code compiles at lightning speed, and, browsing the desktop, you might forget that you’re using a single board computer.
The Odroid also offers an impressive array of connectivity options. It satisfies a longstanding demand for a gigabit ethernet port on an SBC, and comes with a pair of USB 3.0 ports. As such, it’s great for situations where you need to transmit and receive loads of data in a short amount of time.
When it comes to booting, you’ll have two options to choose from: a MicroSD card or an eMMC module. You can choose between the two via a switch on the bottom of the SBC. Finally, you’ll find a power supply thrown into the box alongside the board. There’s even a built-in power switch, allowing you to turn the thing on and off without yanking out the cable or cutting off the wall supply.
Those eight cores require a little bit of cooling. The first thing you’ll notice when you get the device out of its antistatic bag is that there’s a heatsink and fan assembly bolted to the front. If you can’t stand the noise, then this can be easily swapped out for a passive heatsink – although a much taller one. Moreover, since the eight cores are clocked differently, some tinkering might be required to optimize the system for your purposes. There’s no Wi-Fi or Bluetooth built-in, and so those looking for wireless LAN will have to attach peripheral devices. With these minor exceptions aside, it’s difficult to fault the XU4 for more advanced SBC enthusiasts.
So what's the best single board computer?
If there’s a single conclusion to be drawn from this list is that the SBC market is varied and bustling. We could have mentioned other worthy products like the Asus Tinker Board, Gigabyte’s Apollo-Lake-powered GA-SBCAP3350.
There is no single ‘best’ SBC; each satisfies a different niche. Direct comparisons between them are therefore almost always misguided. The Odroid might far outstrip a Raspberry Pi in terms of power, but since it costs twice as much, the two can hardly be described as competitors.
Before buying, consider your budget and requirements. If you’d like to monitor the moisture content of the soil in your garden, and hook the resulting data up to a sprinkler system, then the connectivity of a BeagleBone might be tempting. If you’ve got money to burn and you’re looking to do something truly revolutionary in the field of robotics, then the Jetson will surely appeal.
Most of the people reading this roundup, however, will be relative newcomers who aren’t sure what it is they’re looking for. If that’s you, then we recommend the Raspberry Pi. Not just because it’s affordable, but because it enjoys the widest support. You will inevitably encounter difficulties during your first forays into the world of SBC (that’s part of the joy of using them), and having that body of expertise to hand will spare you hours of frustration. Then, once you’re a little surer of yourself and what you’d like to achieve, you can make the switch to one of the more specialized pi alternatives. As we’ve learned, there are plenty to choose from!
