How to Plan Your Circuit with Power Consumption in Mind
When first planning a circuit, we tend to think about how we’re going to get it to function. Power consumption however, tends to be something that only gets considered in more advanced stages of the project. This makes sense, since you first want to make sure that the circuit you made actually works. But there are good reasons to think about your Arduino power supply right from the start.
In some cases, optimizing a circuit’s power consumption can make it last for hundreds, or even thousands of times longer on the same power supply.
In this post, we’re first going to take a closer look at the different Arduino power supply options, from on-board 9v batteries to external ac power from the wall. We'll provide a few tips on how to optimize your circuit’s power consumption, look at how to build a more efficient circuit, and see what practical changes you can make to an existing circuit to squeeze a little more performance from it.

Most embedded systems and hobbyist circuits use two different sources of power: batteries and grid supply.
If your circuit needs to be mobile, you’ll need a battery-powered solution. Batteries come in many different varieties, each of them with their own technology and output voltage. All types of batteries output a variable voltage, which diminishes as the charge drops.
Batteries come with a fixed voltage which isn’t always the right operating voltage for the circuit you’re working on. In order to supply the circuit with a stable and adequate voltage you’ll need to use a voltage regulator. Arduino boards come with a built-in voltage regulator which lowers the input voltage from 7-12v down to 5v power that the microcontroller can deal with. These components introduce their own inefficiencies, which we’ll take a look at a little later.
Let’s take a look at a few of the different battery technologies available:
Alkaline batteries rely on a crystal which, once used up, cannot be put back together again. As such, they’re not rechargeable. And their energy density isn’t all that impressive, either: 9v alkaline batteries will, if used constantly, drain very quickly indeed. With that said, alkaline batteries are safe and ubiquitous, and a great way to keep low-power circuits running.
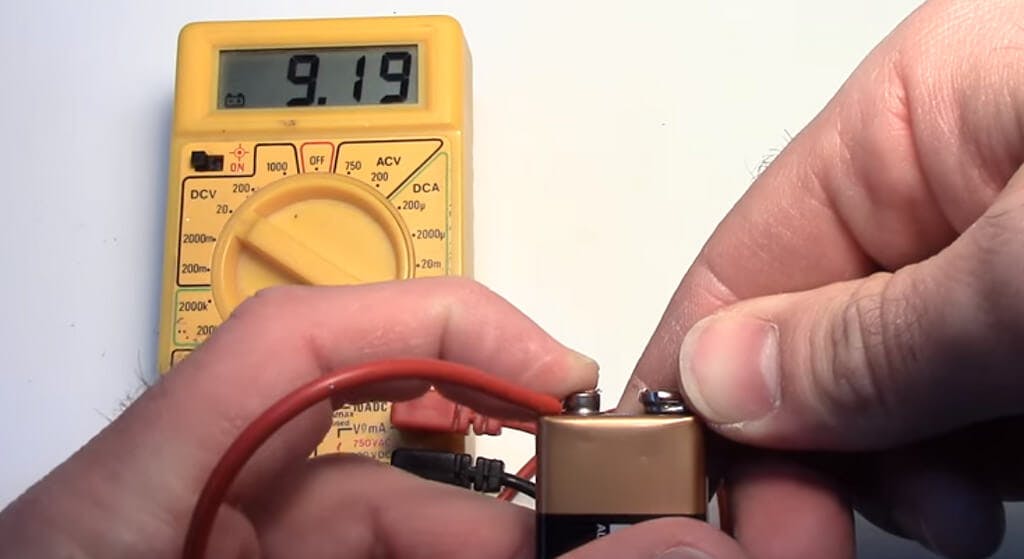
“9 volt Alkaline Battery Test” by quiethut.com is licensed under CC BY 2.09 volt Alkaline Battery Test” by quiethut.com is licensed under CC BY 2.0
Nickel Cadmium is what you’ll find wherever cost, discharge rate and lifespan really matter. Walkie-talkies, video cameras and portable drills are all powered using NiCd. Unfortunately, batteries of this sort are toxic, and so must be disposed of carefully.
This material offers superior energy density to NiCd, but it tends not to last as long. It’s the stuff you get in phones and laptop computers.
Here’s another lightweight technology that’s great for portable electronics. It works using lithium ions, which move from one electrode to another during discharge, and back again during recharge. Lithium-ion batteries require careful handling if they’re to be used safely. When they’re charged too quickly, or compressed, they tend to explode. You might recall a couple of years ago when Samsung had to issue a grovelling recall after their Note 7 phones started bursting into flames – that’s Lithium Ion done badly.

“General discharging Li battery diagram” by Sdk16420 is licensed under Creative Commons Attribution-Share Alike 4.0 International license.General discharging Li battery diagram” by Sdk16420 is licensed under Creative Commons Attribution-Share Alike 4.0 International license.
Some batteries, like the one in your car, are rechargeable. They’re built to be charged constantly throughout their lifespans, which makes them a convenient way of obtaining power if there’s a way of keeping them topped up.
An Uninterruptible Power Supply aka UPS is a good example – it’ll sit in a server room until the power goes out, and then provide enough time for everyone’s work to be saved during a power outage. Then, when the power goes up again, it’ll recharge. The same applies to car batteries, which are charged when your car’s engine is running.
Given the longer lifespan and affordability of non-recyclable batteries, they might be suitable in some lower-power applications – for example, you might use a 9v battery in a set of active guitar pickups.
The function of a wall adapter is to turn the high-voltage alternating current that comes out of the wall into low-voltage direct current that your circuit can use. This is achieved through the use of a transformer, which drops the voltage, and a rectifier, a component which only allows current to flow through it in one direction, thereby removing the negative portion of the signal.
The resultant current can then be passed through a series of capacitors which smooth out the peaks and drops. External power supplies of this sort can be dangerous if mishandled, so in most cases it’s best to use off-the-shelf solutions rather than home-made ones.
We should also mention USB, which provides a convenient means of getting 5v power to your circuit, which can then be transformed down to 3.3v for greater efficiency. USB cables are everywhere and shopping for replacements is straigtforward. Plus, you'll be able to pair your circuit with a rechargeable USB power pack for a little bit of mobility as well. Both the Arduino UNO and Raspberry Pi can be powered via USB.
If you’re building a circuit for an outdoor project where there’s enough sun, then making use of this sort of power supply might effectively cut your power consumption to zero – or even less!
Solar energy isn’t the only form of renewable energy out there – you can also generate power from flowing water and wind. Each of these comes with the same drawback, however; they only work when the power source is available.
In some cases, this might be part of the function of the circuit. For example, in our sunflower project, we used an LDR that detects when there’s light, and triggers the Arduino to move the motor. Taking this project one step forward, we could’ve used solar power to power the circuit, once the sun’s out.

If we’re going to reduce the amount of power we’re consuming, it’s worth knowing exactly how much is going into your existing circuit. That means refreshing ourselves on the basics of electricity.
Voltage and current are probably the two most important concepts to understand.
Voltage refers to the difference in potential energy between two points, caused by different amounts of charge at these points.
Current refers to the actual flow of electrons in a conductive material, which is caused by the voltage.
The total energy (power) consumed by an electronic circuit can be measured in Watts. We can determine the wattage of a circuit by simply multiplying the voltage (in volts) by the current (in amps). So, if we have a 5v supply and we’re drawing 500mA, we’re going to end up using 2.5 Watts.
There is a third consideration, and that’s the resistance between the two points. This describes the material’s ability to conduct those electrons. For instance, elements like copper or gold are highly conductive, while an insulator like rubber is highly resistive.
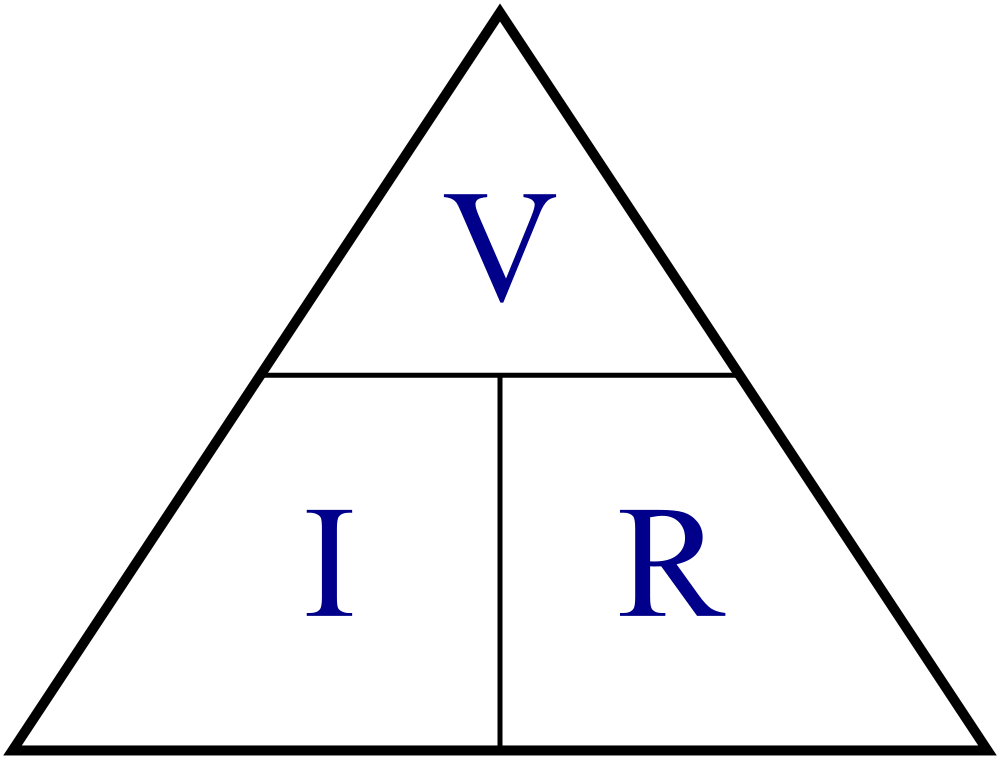
Ohm’s Law triangle: Voltage, Current, Resistance
By introducing resistance into the circuit, we’ll reduce the current flowing through it, and prevent power from being used as quickly. If you place a resistor in front of an LED, you’ll protect the component and prevent it from sourcing current. The strength of the resistor in ohms will determine the extent of this drop, and the reduction in power used.
We can also manipulate the voltage going in. Many smaller, modern components are able to get by using less voltage, which makes them ultimately more power-efficient. We’ll get back to this later.
Your choice of components will hugely influence the amount of power your circuit uses. In each case, we want to pick the component that does the same job using less power, while still bearing in mind other factors like cost.
At the heart of most circuits lies a microcontroller. You’ll want to pick one that’s fast enough to do the job, but not so fast as to be wasteful. You’ll also ideally want to pick a controller that deals in lower 3.3v signals rather than 5v ones, as the former uses proportionally less overall energy to get the job done.
For example, you might have developed a project on an Arduino UNO, using the ATmega328. This is a powerful and flexible microcontroller with plenty of GPIO pins and up to 20Mhz clock. But what if your project doesn’t need any of that? What if you’re just, say, recording the temperature at hourly intervals? In such a case, it might be worth switching over to a smaller controller, like a standalone ATtiny85 microcontroller.
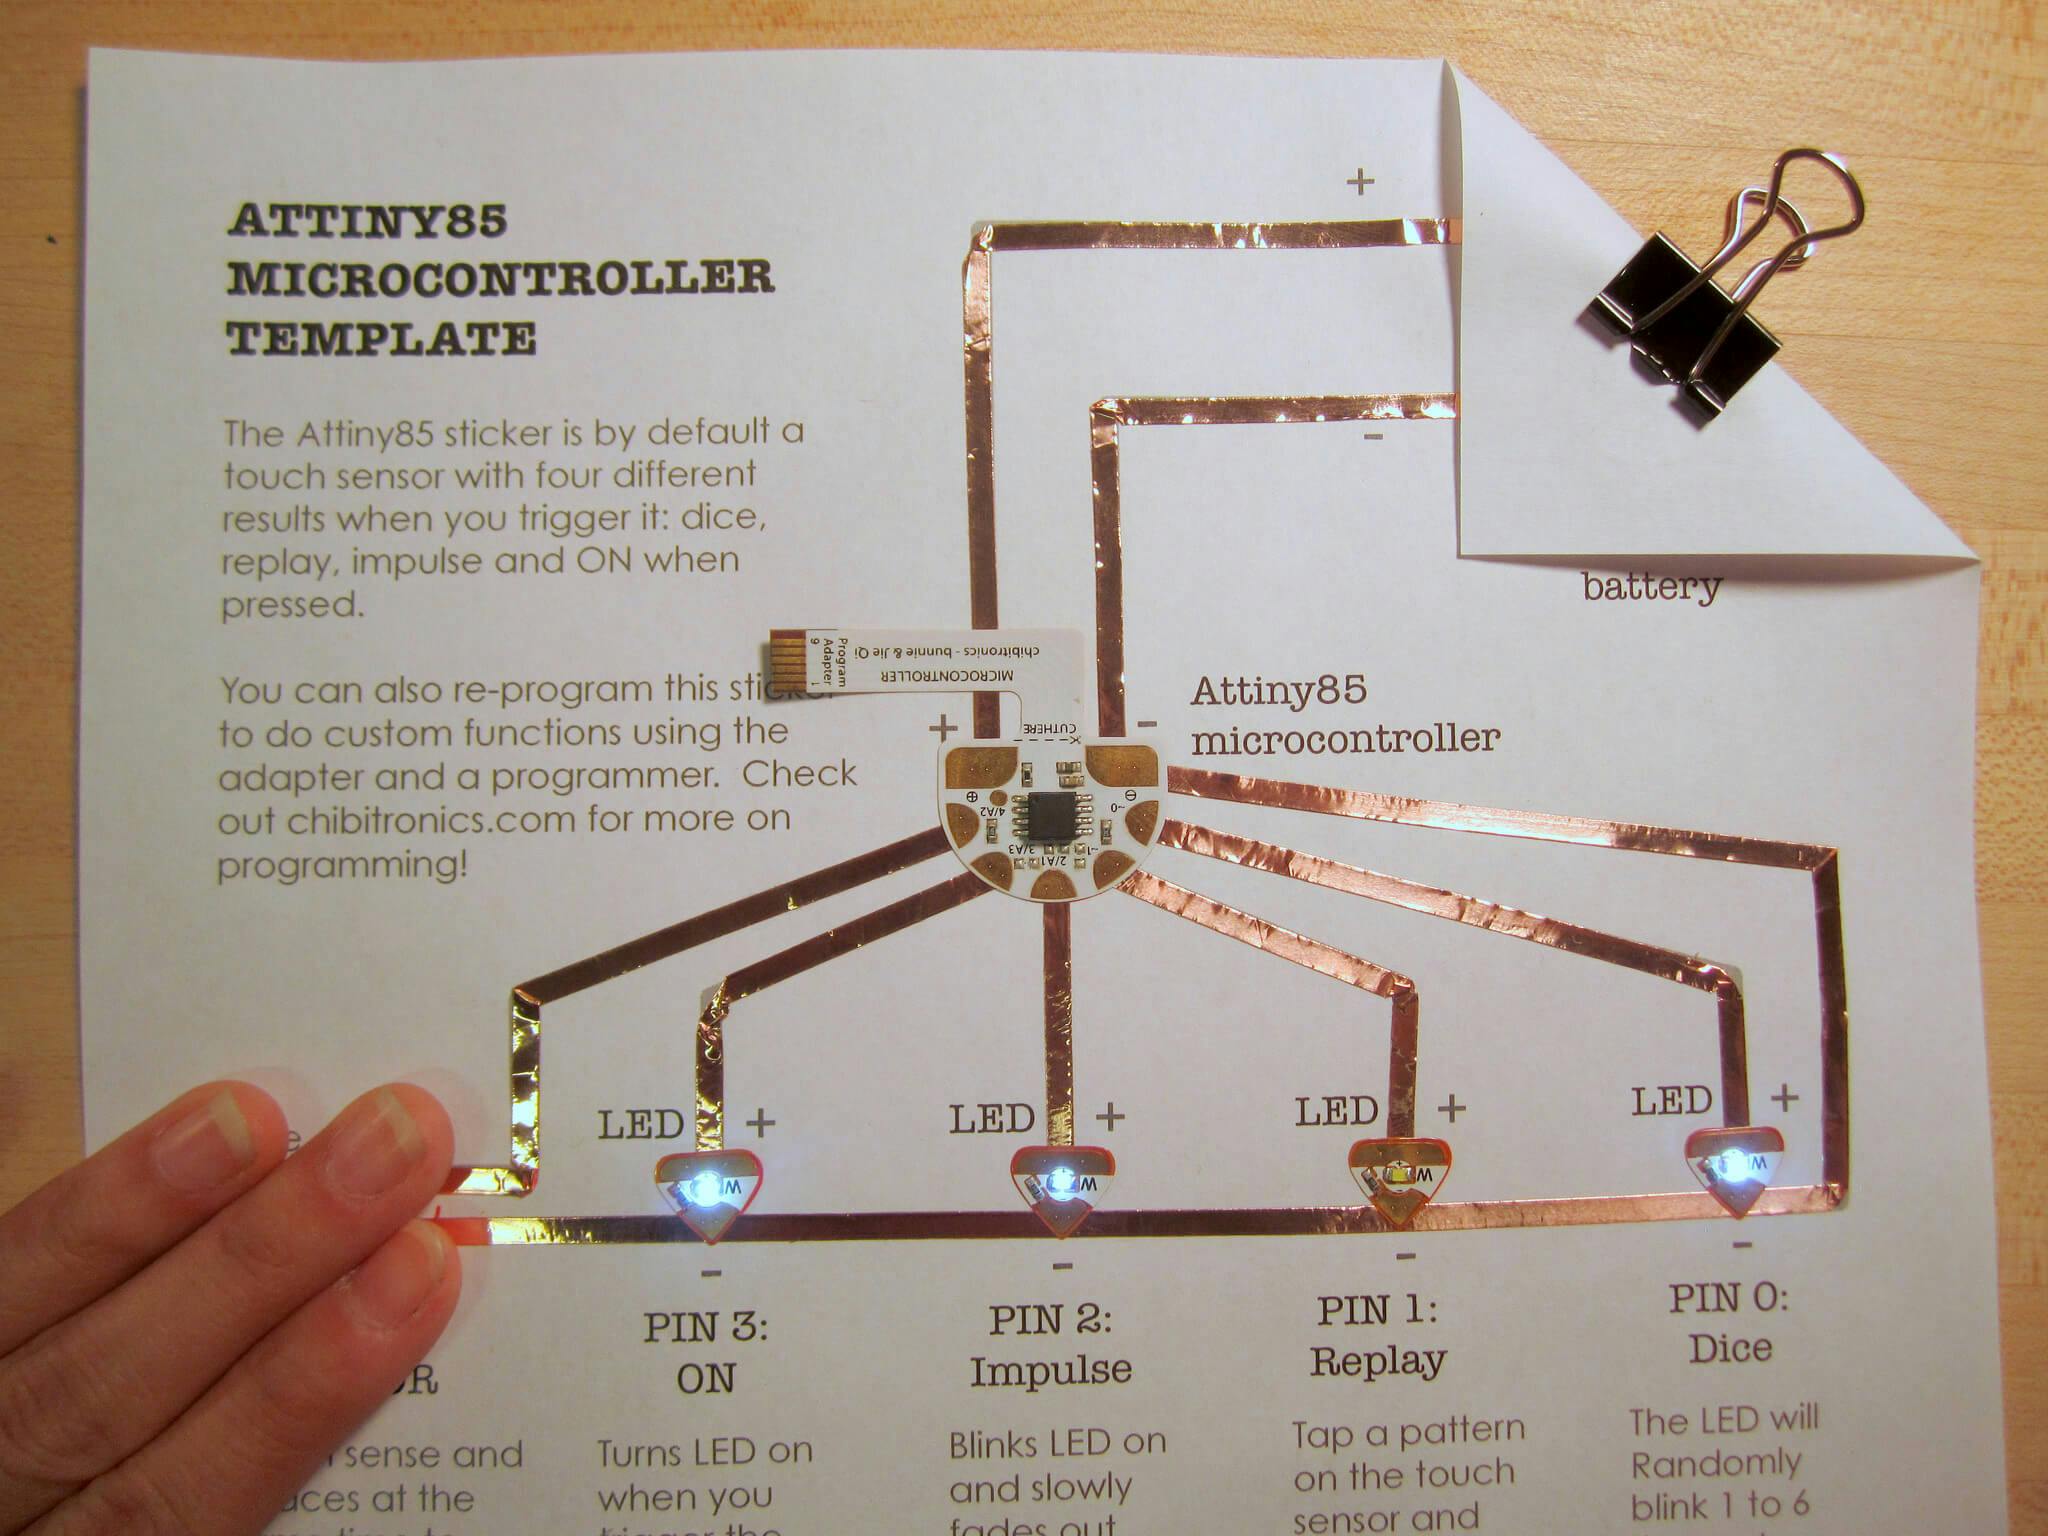
“ATTiny Microcontroller template” by jieq is licensed under CC BY 2.0jieq is licensed under CC BY 2.0
Another option might be to underclock your microcontroller through software, or allow it to sleep when not in use. We’ll touch upon these solutions a little later on.
We don’t want to go overboard on any of our other components, either. If a component is rated to work at 3.3v, then bring it into your circuit. That means selecting active components only where they’re necessary.
Active components are those which require a power source, while passive ones are those which do a job without one. If you can make your circuit work using a passive component, the chances are that it’ll be simpler, more efficient, and more elegant, too.
It’s also worth thinking about how much control you’re going to have over sensors, and how much power they draw. For example, a simple LDR is going to be more efficient than an RGB light sensor – and thus if your circuit doesn’t need the extra functionality, then simplicity is usually preferable.
In some instances, you might wish to use a special sort of integrated circuit which takes in one level of voltage and outputs another. These components are especially useful if you have specific voltage needs, but you’d prefer to keep the convenience of a given output from your battery.
Power converters come, for the most part, in two sorts. There are boost, or ‘step-up’ converters, which increase the amount of voltage, and voltage regulators, which decrease it (usually to a more stable, lower level).
Note that these components don’t create energy from nothing (as that’s physically impossible). In order to step up the voltage, step-up regulators decrease the current. A step-up converter is a useful component in situations which require fewer batteries. For example, you might want to create a 3.3v circuit using just a single 1.5v battery. Provided that the circuit isn’t drawing much current, you’ll be able to get away with doing so. In situations where the battery is being constantly recharged while the circuit is running, such as on a wind-turbine or solar-powered light, this might not be such a problem.
To get the maximum benefit from your power converter, you’ll want to select the most efficient one available, and the one that’s best suited to your circuit. Circuito.io will choose a power converter for you, but it’ll be one that’s popular and easy to track down. If you’re willing to spend a little time digging around for something that’s a better match for your circuit, then you’ll be able to make your design even more power-efficient.
We’ve run through a few of the factors that influence a circuit’s power consumption. But as you come to finalize your design, you’ll want to bear in mind a few extra tricks and tips that will knock off a few extra milliamps, and make your design as efficient as possible.
When you’re building your circuit on an Arduino, (or any other prototyping board) you’ll have a range of components and functions at your disposal. The board has been put together to suit the widest possible range of different projects. But once you’ve gotten a design put together, you might find that many of these components are surplus to requirements.
Perhaps the most obvious candidate for removal is the power LED. On an Arduino board, this is hardwired to the +5v power bus via a surface-mount resistor. It’s therefore not possible to prevent it from coming on through software. If you’d like to deactivate it, you’ll need to bridge the two pins, or remove the LED entirely.
Either option requires taking a soldering iron to your Arduino. This will cause permanent change to it, which is bad news if you’d like to keep it for different projects in the future. A better idea might be to transfer the entire Arduino circuit onto a new, separate board and simply remove the power indicator LED from the circuit. If your circuit incorporates UART serial communication, you might also remove the transmission/reception LED, too.
We’ve already discussed the advantages of downsizing your microcontroller. But even if you’d like to stick with the ATMega328 that ships as standard with the Arduino board, it’ll still be worth transferring to a standalone controller or a low-powered alternative controller like the Arduino Pro Mini. This will allow you to dispense with the USB power bus and other such components.
By default, Arduino boards come with a linear regulator that’s efficient during standard operation. But when we’re putting the board to sleep (which we’ll get to in a moment), this efficiency tends to plummet because of a tiny amount of current leaking through the ground pin. When we’re only drawing a little bit of power in sleep mode, this tiny amount begins to make up a significant portion of the total power consumed. So what are we to do about this?
The first option is to simply remove the linear regulator from the circuit altogether. Once you’ve done this, you’ll need to supply the board with the appropriate 3.3v power. The microcontroller probably won’t be all that fussy about the voltage going in – the average ATMega328 can deal with voltages up to 5.5v, and as low as 2.7v, according to the datasheet. The other parts of your circuit might not be quite as forgiving.
Another option is to replace the linear regulator with something more efficient. Here’s where it might be useful to swap to a switching regulator.
Linear regulators are the simpler and more affordable variety. They vary their resistance to meet the incoming load, and thereby produce a fixed voltage. In order to do this, they require a voltage going in that’s higher by a fixed amount, called the dropout voltage. This is where inefficiency comes in – this difference between input and output is transformed into heat. It’s therefore wasted energy.
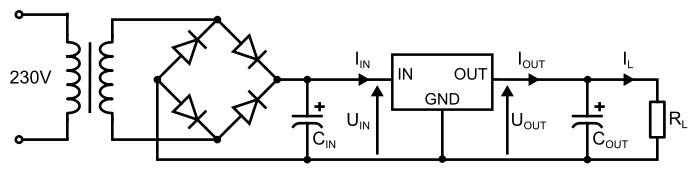
power supply with linear voltage regulator
Switching regulators are slightly more complex. They work by turning a series of switches on and off, much like the PWM generator on your microcontroller. By lengthening or shortening the duty cycle, the regulator is able to alter the load.
This construction is more efficient because it’s always either on or off, which means very little power is wasted. But it also means that we can create voltages that are higher than those coming in. So, if your circuit needs to step down, up, or do both, the switching regulator will be able to handle it.
Now, you might think that this means that switching regulators are always more efficient. But we need to consider the behavior of the regulator at very low input levels. This is where efficiency tends to drop significantly– down from 80% or higher to 10% or even lower. For this reason, it’s worth carefully studying the datasheets before investing in a regulator. Look for the quiescent current – that’s the amount consumed by the regulator when it’s not doing anything. The lower the better.
Bear in mind that your voltage regulator will need to be combined with two suitable ceramic capacitors. To find out the optimal values, take a look at the voltage regulator’s datasheet, where you’ll find value recommendations along with a wiring diagram.
As well as swapping out a few pieces of hardware, we can also use software to deactivate certain non-essential parts of the microcontroller, as well as turning it off when it isn’t needed. In doing so, we can vastly decrease the consumption of the unit – to less than a hundredth of its power-draw while activated.
By default, your microcontroller is in active mode. This means that it’s constantly cycling through its instruction set, and consuming lots of power in the process. In order to avoid this, you can activate something called ‘power-down sleep’. This is a special mode which basically deactivates the chip until it next receives an interrupt. You can either activate this temporarily, or indefinitely, depending on the application.
We used a “deep-sleep” function to our gesture remote control, for example, since we wanted to extend battery life. So instead of having the circuit always “on” we set it to “sleep mode” until it receives a signal from the gesture sensor through the Arduino interrupt pin.

As well as the extra components that come loaded onto a prototyping board, there are plenty of separate circuits included within the microcontroller IC itself, some of which you might never use. These include things like timers, brown-out detectors and peripherals. These can be disabled conveniently using a low-power library, such as this one by Rocketscream.
It’s worth going through your code and identifying which of the Arduino’s internal modules you’re not using. It’s a very rare circuit that uses all of them, and if you’re creating something that’s small and battery-powered, you’ll probably be able to save power by turning off ADCs, SPI, I2C and similar components.

Power optimization is useful not only in small battery-powered applications where long lifespan is crucial, but in just about every circuit you could think of. You can easily achieve huge reductions through software and hardware modifications, and so there’s no reason not to look into it!